Rendering is a popular way to improve the appearance and durability of a home’s exterior. It involves applying a layer of cement or other material to the walls, which can provide added protection against weather damage and improve the overall look of the property. If you’re considering renovation, it’s important to understand the process and steps involved. In this step-by-step guide, we’ll walk you through the process of house rendering, from preparing the walls to finishing the final coat. Whether you’re a DIY enthusiast or planning to hire a professional rendering company, this guide will provide you with a comprehensive overview of what to expect during the rendering process.
What Is House Rendering?
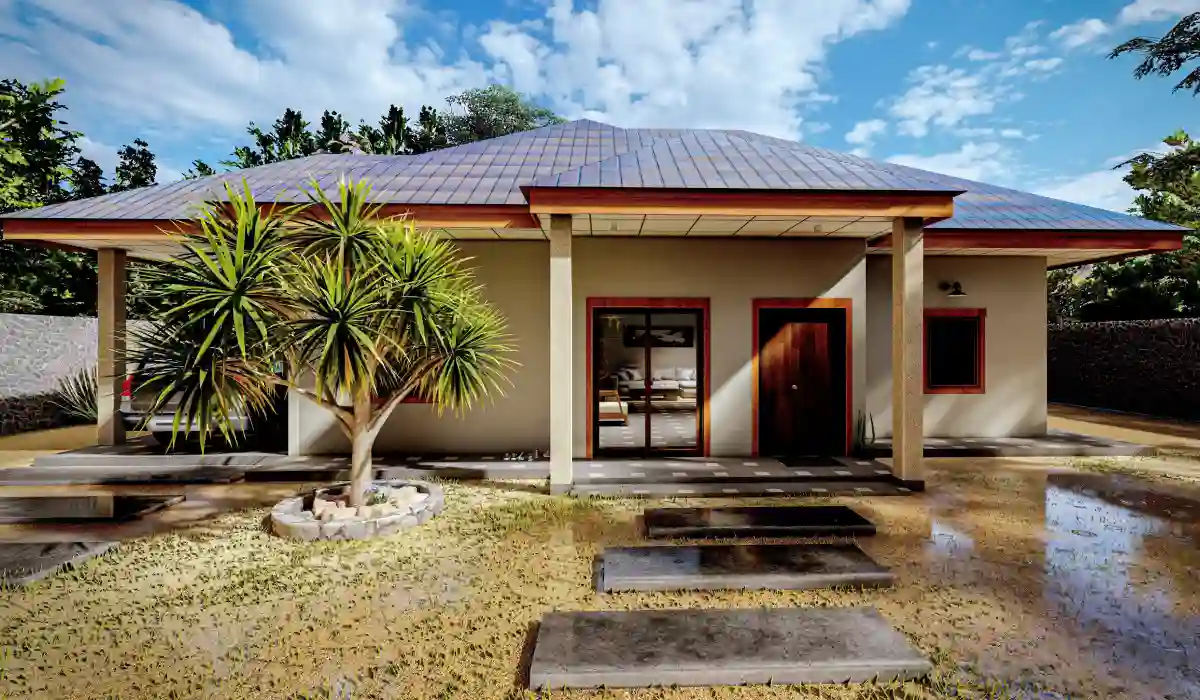
House rendering is a popular choice for modern home cladding for many excellent reasons. As a bonus, it shields the home from the elements, such as wind and rain, improving its value and longevity. Rendering a home may do more than just make it seem nicer; it can also boost its resale value and cut energy costs. House rendering is a form of cladding that is applied to the outside of a building in much the same way that plaster is used on the inside. Rendering your home may be done using a variety of materials, including cement, acrylic, and lime. Depending on your demands and tastes, you should select a material that best suits those characteristics. Also, because it adds an extra layer of insulation to the walls, home rendering can aid in lowering noise pollution. Exterior house rendering is a popular choice among homeowners who want to give their homes a fresh and updated look.
What Are the Benefits of Rendering a House?
Rendering a house offers several benefits, including:
- Enhanced appearance: Rendering can give a property a fresh new look, making it more attractive and modern.
- Value of Property: The value of a property can go up if the rendering job is done well, which makes it more appealing to potential buyers or renters. For example, rendering a house before putting it on the market with the help of a realtor can increase the chances of a quick sale by enhancing its appearance and value.
- Protection: Rendering acts as a barrier to protect the outside walls of a building from damage caused by the weather and normal wear and tear.
- Improved insulation: Certain types of rendering can help improve the insulation of a property, reducing energy bills and creating a more comfortable living environment.
- Reduced maintenance: Rendered walls don’t need as much maintenance as exposed brickwork or other building materials, so they don’t need to be cleaned and fixed as often.
- Versatility: Rendering can be used on a wide range of building materials, such as brick, stone, and concrete. This makes it a versatile way to improve the look and durability of a property.
Overall, rendering a house has a number of benefits that can make it look better, increase its value, and make it last longer.

A Step-by-Step Guide to House Rendering
Here is a step-by-step guide to house rendering:
- Prepare the walls: The first step is to thoroughly clean the walls and make sure they are free from any loose debris or flaky paint. Any cracks or holes should also be repaired. Once the walls are clean and repaired,
- Apply a base coat: With a trowel or sprayer, a base coat of render is put on the wall. This provides a smooth surface for the final coat to adhere to. An example of a base coat is a sand and cement mix. Once the base coat is applied, it needs to be left to dry completely before the final coat can be added. The final coat can be coloured or textured to achieve the desired finish.
- Apply the topcoat: Once the base coat has dried, the topcoat of the render is applied. This is where you can choose the desired texture and colour for your walls. Examples of topcoats include acrylic, silicone, and monocouche render. Acrylic render is a popular choice due to its flexibility and durability, while silicone render offers excellent water resistance. Monocouche render, on the other hand, is a thicker option that provides a more traditional textured finish.
- Finish the render: Once the topcoat has dried, any final touches or detailing can be added. This may include carving out decorative features or adding a final coat of paint. It is important to take your time during this step to ensure that the final product meets your expectations. Once you are satisfied with the details, allow the project to fully dry before using or displaying it.
- Clean up: Once the rendering is done, any extra should be cleaned up and thrown away in the right way. This is important not only for how it looks but also to keep the area around it from getting damaged. For proper disposal, the extra render may need to be bagged and thrown away according to local laws.
It’s important to note that rendering a house is a complex job that requires skill and expertise. To make sure the job is done right and safely, it’s best to hire a professional rendering company.
5 Creative House Rendering Ideas.
Here are some creative house rendering ideas to enhance the visual appeal of your home:
- Texture and depth: Add texture and depth to your house rendering by incorporating a mix of smooth and textured finishes. This can create visual interest and make your home stand out.
- Colour contrast: Consider using contrasting colours for your house rendering, such as a light-coloured render with dark window frames and accents, to create a dramatic effect.
- Accent features: Add accent features to your house renderings, such as a feature wall or decorative mouldings, to create a focal point and add character to your home.
- Natural materials: Incorporate natural materials, such as stone or wood, into your house rendering to create a warm, inviting feel and blend in with the surrounding environment.
- Lighting: Use lighting to enhance your house rendering by highlighting key features and creating a welcoming ambience. This can include outdoor lighting to showcase the architecture or indoor lighting to highlight artwork or architectural details.
Tips for Transforming Your House’s Rendering: Dos And Don’ts.
DOs:
- Do your research and choose the right type of rendering material for your specific needs and preferences.
- Do spend money on good materials and tools to make sure the job looks professional and lasts a long time.
- Prepare the surface properly before applying the render to ensure proper adhesion.
- Do carefully follow the instructions from the manufacturer and take your time when applying the paint to make sure the finish is smooth and even.
- Do think about hiring a pro if you don’t know how to do any part of the rendering process or if you want a more complicated or specialized finish.
DON’Ts:
- Don’t rush the preparation or application process. Proper preparation and a slow, steady application will yield the best results.
- Don’t ignore any structural issues or damage to the walls. These must be addressed before rendering to ensure a strong and stable surface for the render to adhere to.
- Don’t mix or apply the rendering material when the temperature or humidity is too high or too low. This can affect how it cures and how it looks in the end.
- When working with the rendering material, don’t forget to protect your skin, eyes, and lungs, as it can be harmful if eaten or breathed in.
- Once the rendered surface is done, don’t forget to take care of it properly. If you don’t, it will break down and need expensive repairs in the future.
What Types of Materials Can Be Used for Rendering a House?
There are several types of house-rendering materials available, including:
- Cement Render: This is a popular way to finish a house because it is strong and lasts a long time. It is made from cement, sand, and water and can be finished in a range of textures.
- Acrylic Render: This type of render is made of plastic instead of cement. It is popular because it is flexible and doesn’t get damaged by water.
- Lime Render: Made from lime, sand, and water, this type of render has been used for centuries and is known for its breathable properties.
- Polymer Render: Like acrylic render, polymer render is a synthetic product that is highly flexible and durable.
- Insulated Render: This type of render has a layer of insulation to help save energy and prevent heat loss.
- Monocouche Render: It is a cement-based render that is already mixed and usually only needs one coat, which saves time and money.
Each type of rendering material has its own pros and cons, and the one you choose will depend on things like the finish you want, your budget, and where the property is. Talking to a professional is the best way to figure out which material will work best for your needs.
What Are the Top House Rendering Colours and Why?
Colours for house siding are mostly a matter of personal taste and can change based on things like the style of the house, its surroundings, and design trends in the area. Still, here are some popular colours for home siding and the reasons why they are so popular:
- White: White is a popular paint colour for homes because it looks clean, fresh, and classic. It also reflects sunlight, which keeps the inside of the house cooler in hotter regions.
- Beige: Beige is a warm, neutral hue that works well with various architectural types and fits in with the surroundings. It also creates a subtle contrast with darker accessories like shutters and doors.
- Grey: Gray is a versatile hue that may seem light and airy as well as dark and dramatic. It complements both old and modern buildings and has a classy appearance.
- Blue: Blue is a soothing hue that is frequently utilized in seaside homes. It looks well with white trim and accessories and gives a calm, beachy atmosphere.
- Green: Green is a natural, earthy hue that complements the surrounding scenery. It is especially effective in homes with a lot of vegetation or in rural locations.
Finally, the best colour for house rendering is one that matches the home’s architectural design, fits in with the surrounding surroundings, and shows your particular taste and style.
Frequently Asked Questions
Can I Render My House Myself?
You can, in fact, render your own home, but it is hard, takes a long time, and requires skill and experience. Before you start, you need to figure out what kind of render you will use and make sure that the walls can be rendered. Among other tools and supplies, you will also need to buy render mix, a trowel, and a hawk. During the rendering process, sand, cement, and water are mixed and put on the outside of your home. Precision and patience are needed to make sure that the render is spread evenly and smoothly. If you have never done this before, you might want to try out a small part of the house before doing the whole thing. Notably, rendering may be a dirty and difficult process, so be prepared to devote a great deal of time and work to the project. If you don’t have faith in your skills, it might be best to hire a professional to do the job right. You can render your own house, but you’ll need the right skills, knowledge, and patience to make sure it looks great. If you are uncertain, it may be wise to consult a specialist. In addition, remember that the cost of supplies and equipment may rapidly mount up, so be sure to budget properly. Remember that a well-executed exterior renovation may dramatically raise the value and curb appeal of your house.
Is it Worth Rendering a House?
Whether or not it is worth it to render a house depends on a few factors, such as the age and condition of the home, your personal tastes, and your budget. Rendering can protect your home’s exterior from weather damage and make it look better, which can increase its value and curb appeal. Also, it helps minimize energy expenses by providing added insulation. However rendering is a time-consuming and expensive process, and if your property is in decent shape, it may not be necessary. In addition, if you want to sell your property soon, the investment may not be worthwhile unless you are convinced that the extra value will justify the cost. The decision to sell your home should ultimately be based on your personal circumstances and priorities.
How Much Does Rendering a House Cost in the UK?
The cost of rendering a house in the UK can vary depending on several factors, including the size of the property, the type of render used, and the complexity of the job If you’re considering having your home’s exterior walls rendered in the UK, you can expect to pay between £31.50 and £63 per square meter, including painting. For a typical three-bedroom semi-detached house with approximately 90 square meters of walling, the cost could range from £2,835 to £5,670. The job could take up to two weeks, and you should also budget for scaffolding costs of £500 to £800. For a smaller bungalow with less wall area, the cost could be around £1,575 to £3,150, depending on the amount of scaffolding required. While using monocouche render may be more expensive, it could lead to long-term savings on maintenance costs. Expect to pay between £52.50 and £84 per square meter, including labour, for this type of rendering. (Source: Checkatrade.com)
It’s important to remember that these are just estimates, and the real cost of rendering your home may be different depending on your situation. If you’re considering having your house rendered, it’s always best to get quotes from several reputable contractors and compare them carefully to find the best value for your money.
What Is the Best Rendering for a House?
The best way to render a home depends a lot on the owner’s tastes, budget, and the needs of the property. Yet, there are a few typical alternatives to consider. Acrylic render is a robust, flexible, and waterproof material that is available in a variety of colours and textures. Silicone render is another alternative; it is very water-repellent and resistant to algae and mould development. This form of render is also permeable, enabling water vapour to escape and decreasing the likelihood of getting wet. Monocouche Render is a pre-mixed option that can be applied as a single layer and is available in a number of colours and textures. It is also resistant to the elements and requires little upkeep, making it a popular choice among homeowners. In the end, the finest rendering for a house will rely on a number of aspects, and it is essential to examine the property’s individual demands and objectives before making a choice.
What Is the Cheapest Way to Render a House?
Here are some of the cheapest ways to render a house:
- Sand and cement render: This is the most basic and traditional form of rendering. It involves mixing sand and cement in a 3:1 ratio and applying it to the walls. While it may not have the aesthetic appeal of other options, it is cost-effective and durable.
- Lime Render: This is a more environmentally friendly option, as it uses natural materials such as lime and sand. It is also breathable, allowing moisture to escape, which can help prevent dampness.
- Polymer render: This is a newer type of render that is made from a combination of cement, polymers, and other additives. It is light, flexible, and easy to use, which makes it a good choice for many homeowners who want to save money.
- Roughcast render: This is a decorative form of render that involves adding stones or pebbles to the mix, giving the walls a textured appearance. It is a cost-effective option for adding visual interest to a home’s exterior.
- Insulated render: This is a type of render that includes insulation, providing both weather protection and energy efficiency. While it may be more expensive than other options upfront, the long-term energy savings may make it a cost-effective choice in the long run.
How to render a house for the least amount of money will depend on a number of things, such as the size of the property, the condition of the walls, and the look you want. It’s important to talk to an expert to figure out which option is best for your needs and budget.
Do I Need Planning Permission for House Rendering in the UK?
Repairs, maintenance, and minor improvements like painting don’t require planning permission. Similarly, weatherboarding or rendering your house is exempt from planning permission if the materials used match those of the existing house. For instance, replacing timber weatherboarding with a cement fibre board of similar appearance wouldn’t need planning permission. However, if you plan to render or weatherboard a brick property, planning permission would be necessary as the materials used wouldn’t match the existing ones. If you live in a conservation area or your property is listed, you’ll need planning permission and/or listed building consent. (Source:Maldon.gov.uk)
How does the duration of council temporary housing affect the consideration of house rendering for stable housing?
If you are living in a temporary accommodation then this question is for you. House rendering is a crucial aspect of property maintenance and aesthetics. When it comes to temporary accommodation, understanding how long the council can keep you in such housing is essential. The duration can vary depending on multiple factors, including your homelessness status, housing availability, and personal circumstances. It’s vital to be aware of your rights during this period and seek assistance if you feel your situation isn’t progressing as it should. Ultimately, the goal is to transition you into stable and permanent housing, making house rendering a potential consideration for your future residence.
Does “Rendering” A House Add Value in The UK?
Yes, rendering a house can add value in the UK. A well-executed rendering job can enhance the appearance of a property, making it more attractive to potential buyers or tenants. It can also help protect the walls of the property from damage caused by weathering and improve insulation, reducing energy bills.
However, the actual value added by rendering can vary depending on several factors, such as the type of render used, the condition of the existing walls, and the location of the property. It is essential to weigh the cost of rendering against the potential added value, and it may be best to seek professional advice before undertaking any significant home improvement project.
Conclusion
In conclusion, house rendering is a great way to enhance the appearance of your home and give it a fresh new look. By following the step-by-step guide to house rendering, you can achieve a professional and polished finish that will not only look great but also protect your home from the elements.
At first, the process of rendering a house may seem difficult, but with the right tools and preparation, it can be an easy DIY project. However, it is important to keep in mind that certain aspects of the process, such as the mixing and application of the render, require precision and skill.
If you are unsure about any aspect of the rendering process, it is always best to seek advice from a professional. Overall, by investing time and effort into house rendering, you can significantly increase the value and aesthetic appeal of your home while also providing long-lasting protection for your property.